Raspberry PI c64 emulator image

I made a Raspberry PI c64 image a few years back, but never released it on this site. To install it, you’ll need an 8gb compatible SD card, a disk imaging program such as win32diskimager, and a Raspberry PI 2.0 (though all newer pi’s should work as long you do a sudo apt-get update / sudo apt-get upgrade).

This includes a port of vice64, 2400 baud modem emulator with tcpser (needs to be implemented but it’s there. See below.), and a joystick emulator to play games built in. GPIO pinouts for the joystick ports are included in the dox to hook up your old 9 pin style C64 joysticks to the Raspberry PI.

Image file: http://www.mediafire.com/download/3a9jh3stnfq3k34/pi64.zip

Instructions: https://1200baud.files.wordpress.com/2017/06/pi64-instructions.pdf

To get the modem emulator running, exit out of vice emulator after it boots (F12 -> quit), follow these instructions:

type:

tcpser -v 25232 -p 6400 -s 2400 &x64

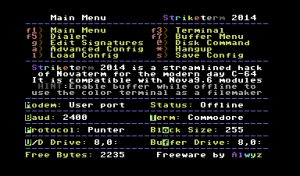
vice will reboot, load up striketerm, the defaults will be for the user port at 2400 baud, and you should be able to get an at/ok response in the terminal.
Strikelink Ultra + Raspberry PI = Complete Modem Solution

Another useful hack. We have macs at my house. All my roommates have macs. Not one pc in the bunch. The only way I’ve been able to BBS at home is using the Comet, hooked to the mac, using the mac’s wifi, and using the Ethernet cable to chain to the Comet. But I’m stuck at 2400 baud with that solution.

Getting TCPSer4j working on the mac was a 12 hour exercise in futility. If anyone can figure that out, be my guest. No luck there. (Using 10.5 Leopard btw)

So, I figured, instead of the comet, let’s get a simple Raspberry PI Solution going. TCPSER can do ANY Baud Rate I want, and pl2303 devices (such as the Strikelink or any other Serial<>USB Device) do not need additional drivers for the PI – they’re already included in the raspbian distro. It’s Built into the system. so let’s give it a shot.

Installing TCPSER is easy on the PI. If you haven’t done it yet.

sudo apt-get install tcpser

That should be it, then from commad line, just run:

tcpser -d /dev/ttyUSB0 -p 6400 -s 9600 -l 4

-d is the device. Yours should be at ttyUSB0, but in case it doesnt work, try USB1, 2, etc. -p is the port. -s is the speed. Strikelink Ultra does 9600 so use that option. -s 38400 for swiftlink/turbo232 etc. -l 4 is the logging level, i always use this.

Plug her in and you’ve got a cheap solution based out of a pi. That took 15 minutes to get running, way better than trying to get the mac rolling. Enjoy!

BBSing with Vice on Linux

Calling BBSes at 2400 baud with Vice on Linux / Rasp Pi is possible, though no good instructions around on how to do it with ease. I spent a good chunk of my day figuring out how to install it on my Raspberry Pi. Thanks to Jasmaz and ShadowM for putting in the time to help me out with this. And VidKid who has hacked the ACIA routines from 1.19 (read his blog here for his method!)

This method is good for calling bbs systems, but not hosting a bbs. Vidkid’s hack has this figured out. The max baud rate for now is 2400.

This pertains to installations of Vice 2.4 with the SDL Library.

sudo apt-get install tcpser
sudo apt-get install netcat

Make sure netcat and tcpser are both on your linux/pi.

from the command line via ssh or standalone run netcat and tcpser

(I’m not sure if this init of netcat is needed but i do it anyway)

netcat 127.0.0.1 25232
(some systems need nc 127.0.0.1 25232 instead)

tcpser -v 25232 -p 6400 -s 2400

Add the &x64 if you aren’t running tcpser via ssh

In Vice, go to F12 -> Machine Settings -> RS232 Settings
Disable Acia interface emulation

Enable Userport RS232 Emulation
Host Device 4
Baud Rate 2400

Device 4 will have the pound symbol followed by a few characters. KEEP the pound symbol but erase everything else!!! After the pound symbol add the following
nc 127.0.0.1 25232

No spaces between the pound symbol and ‘nc’

All 4 device baud rates below to 2400

That’s it, go back to terminal, makesure your term program is using a standard hayes/user port setup (In Striketerm it’s the User Port modem), 2400 baud, type AT in terminal and you should get an ok!

Enjoy!